Modern drill design is not just about the formations itself. Anyone can direct a crowd of people into a shape, we've all done that for yearbook photos. The real beauty comes in the transition between formations. Seeing lines fold over themselves and come together in a shape is memorizing to watch, especially when all the performers have their legs moving the same exact way at the same exact time. This is why technique adds to the beauty of formations.
Young performers usually aren't used to the concept of in-between formations. Their goal is to get to their dot by any means necessary, no matter the pace at which they get there. This can cause many issues - curved pathways, inconsistent step sizes, and poor technique. These are all expected of new performers but should be addressed and eliminated as early as possible. Technique and step sizes can of course be solved by classic across the floor exercises such as 8s and 8s (move 8 hold 8), dig dug (forward 8, left 8 forward 8 right 8) and variations of those exercises. If you've never done those exercises with your ensemble I highly recommend giving them a try.
For curved pathways that can be a bit tricky to teach other than fixing it on the field during our shows. Most across the floor exercises are very formulaic and predictable, not at all how real drill is put together. Across the floors are a great tool to teach and fix technique, teach playing which marching, and understanding basic marching concepts. Taking ideas solely from across the floors and implementing them into drill won't give them all the tools necessary to achieve clean drill.
Here's a simple exercise I did while marching drum corps that I now use on my high school students that helps performers understand pathways and the idea of beauty between formations.
In this example I'm using 9 performers, but this can be scaled to any amount.
The Box Rotation
Exercise setup
- 4 performers create corners of a perfect square
- Remaining performers fill in between corners with equal spacing
- Ensure performers understand clockwise and counterclockwise before starting the exercise
- Ensure performers understand this exercise will be done with direct straight paths, not curved paths, and not as a conveyer belt.
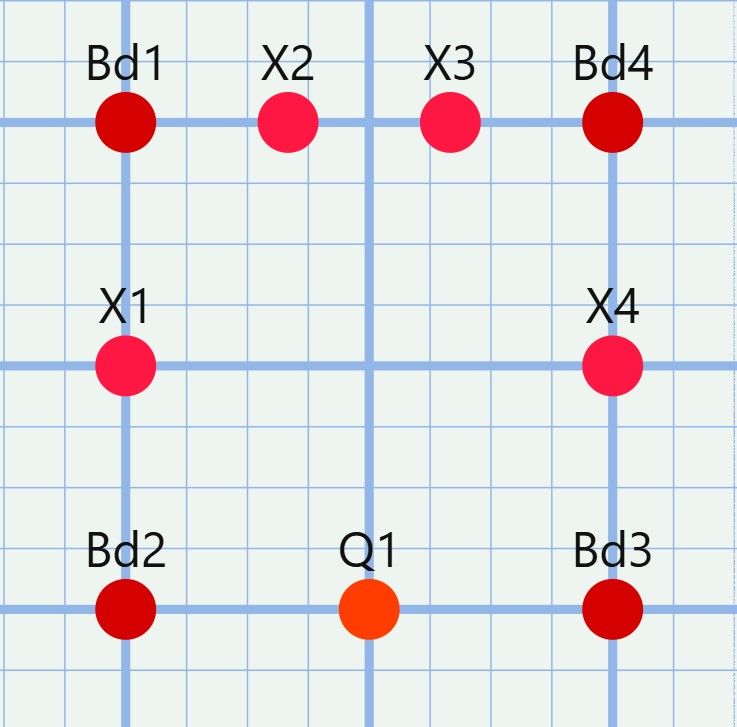
Once all the performers are in a box have them understand the bigger picture of the formation. Let them know they're in a box that has corners and sides. Have them check for guide marks and things to base their position on.
Next have tell them the box will rotate clockwise. For counts I recommend the length of a side in steps * 1.5. In this example a side is 8 steps, so 12 steps will be how many counts a rotation will take.
Have the students understand these concepts
- Where their next dot is
- The path to get to their next dot
- Step sizes need to stay perfectly equal
Their clockwise pathways will look something like this:
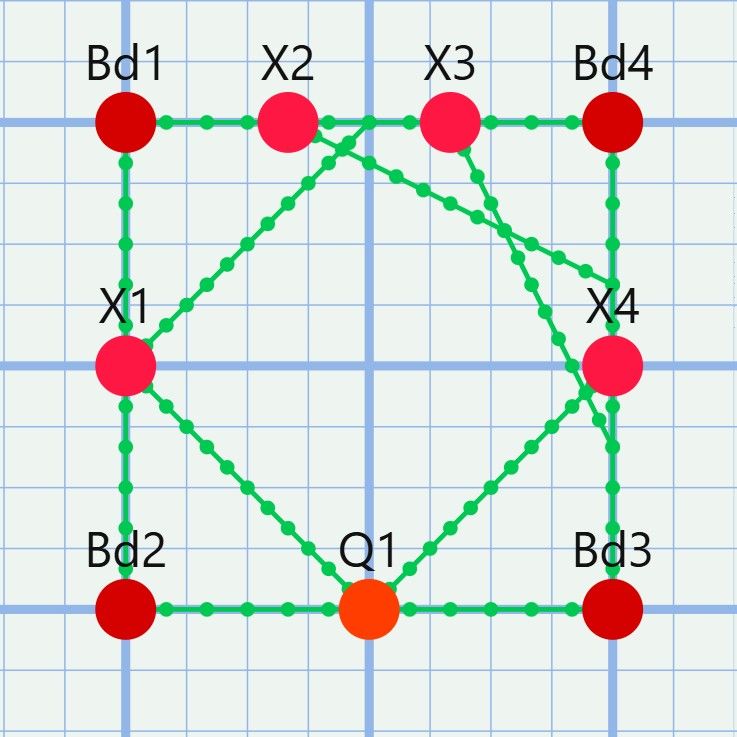
Ask the students these questions:
- Corners what does your pathway look like? (Hopefully they'll answer with "A straight line")
- Sides with one person in-between corners, what does your path look like? (Hopefully they'll answer with "A perfect 45 degree diagonal line")
- For lines with more than 1 person in-between corners, point to the person on your left/behind you. After the rotation where will they be? (Hopefully they'll answer with the appropriate positioning. Ask sides individually for this one. In the example you'll see that X3 ends up in front of X2; if they were to do one more rotation X3 would end up on the left side and X2 on the right side, opposite of what where they started.)
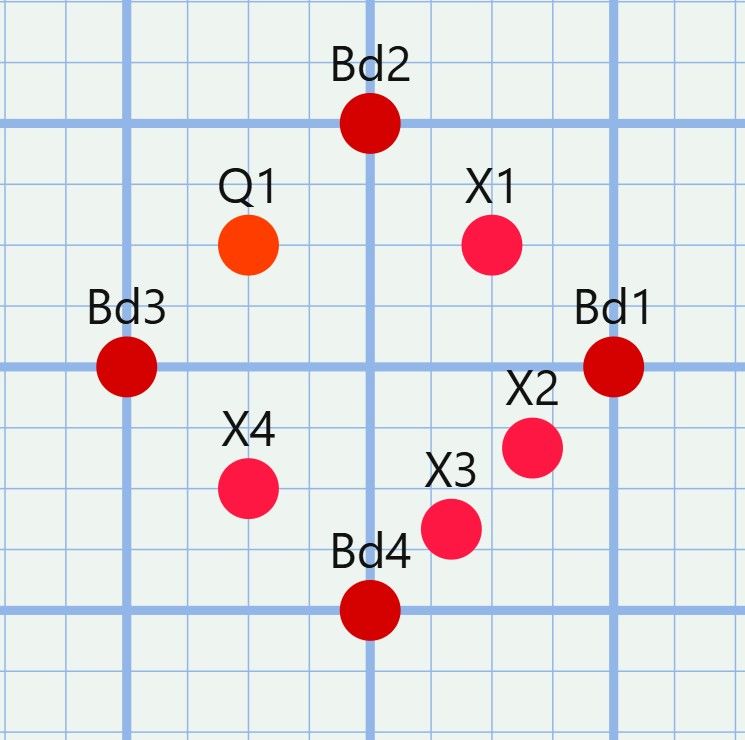
- What happens to the scale of the formation as it rotates? (Hopefully they answer with "it gets smaller")
As you can see in the image below, the form will indeed shrink to the smallest point on the halfway count (count 6 in this case).
After teaching them the first rotation, have them check and adjust. Telling the performers to wait until their told to check and adjust will instill not only good rehearsal protocol, but good performance etiquette as well. This can keep them from moving during holds, painting a giant red arrow towards them saying they're wrong.
From there you can add another rotation, implement holds, have them go the other direction, etc. This exercise is very mailable and can be a great warmup tool to get their heads into drill cleaning mode.
This variation right here is what I like to call "Ping Pong," going back and forth between clockwise and counterclockwise.
We've attached a PDF that has this exercise.